What are ‘Preferences’?
‘Preferences’ are settings that are user dependant. The user can choose what suits him/her best, for example:
- Units and decimals,
- The language
- …
At the first startup of ConCrete, ConCrete takes the default values (stored in the Program Files). When you work with ConCrete, you will customize these settings along the way.
Solution 1
- Close all ConCrete and ConCrete Plus projects.
Even if you get an error on launching ConCrete (Plus), use the Taskmanager to close ConCrete (Plus).
Don’t skip this step! - Go to C:\Users\**YourUsername**\AppData\Local\VirtualStore\Program Files (x86)\BuildSoft\ConCrete
The folder ‘AppData’ is a hidden folder. You can show the hidden folders using the folder options.
If the folder is empty or doesn’t exist, go to Solution 2.
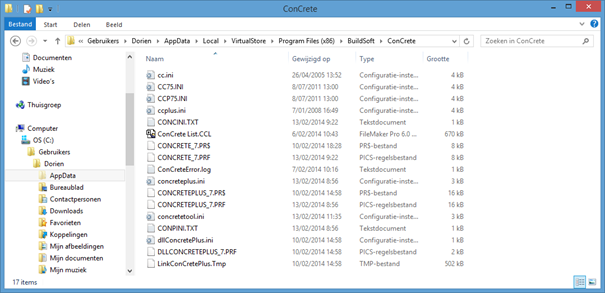
- Delete the content of this folder.
Warning: if you want to keep the defined hollow core slabs (HCS), copy the file CONCRETE_7.PRF to your desktop before deleting. Read about Restoring the HCS library after resetting the ConCrete preferences - Restart ConCrete.
Trouble finding the hollow core slab license? The solution is here.
Solution 2
In some cases, the preferences are not stored in the folder C:\Users\**YourUsername**\AppData\Local\VirtualStore\Program Files (x86)\BuildSoft\ConCrete, but in the folder C:\Program Files (x86)\BuildSoft\ConCrete\.
- Close all ConCrete and ConCrete Plus projects.
Even if you get an error on launching ConCrete (Plus), use the Taskmanager to close ConCrete (Plus).
Don’t skip this step! - Go to C:\Program Files (x86)\BuildSoft\ConCrete\
- Sort the content of this folder by date.
The preferences usually have the same date and a more recent date than the rest of the files in that folder.
Depening on which features of ConCrete (Plus) you’ve used, you’ll obtain more/less preferences. The name of the preference-files is the same as in the printscreen at Solution 1. - Select the preferences and hit delete.
